4 Easy Steps to Transform Your Projects into Storybooks
Posted: February 2, 2017 | By: Youngevity
Storybooks are a way to display, remember, and archive life’s beautiful moments.
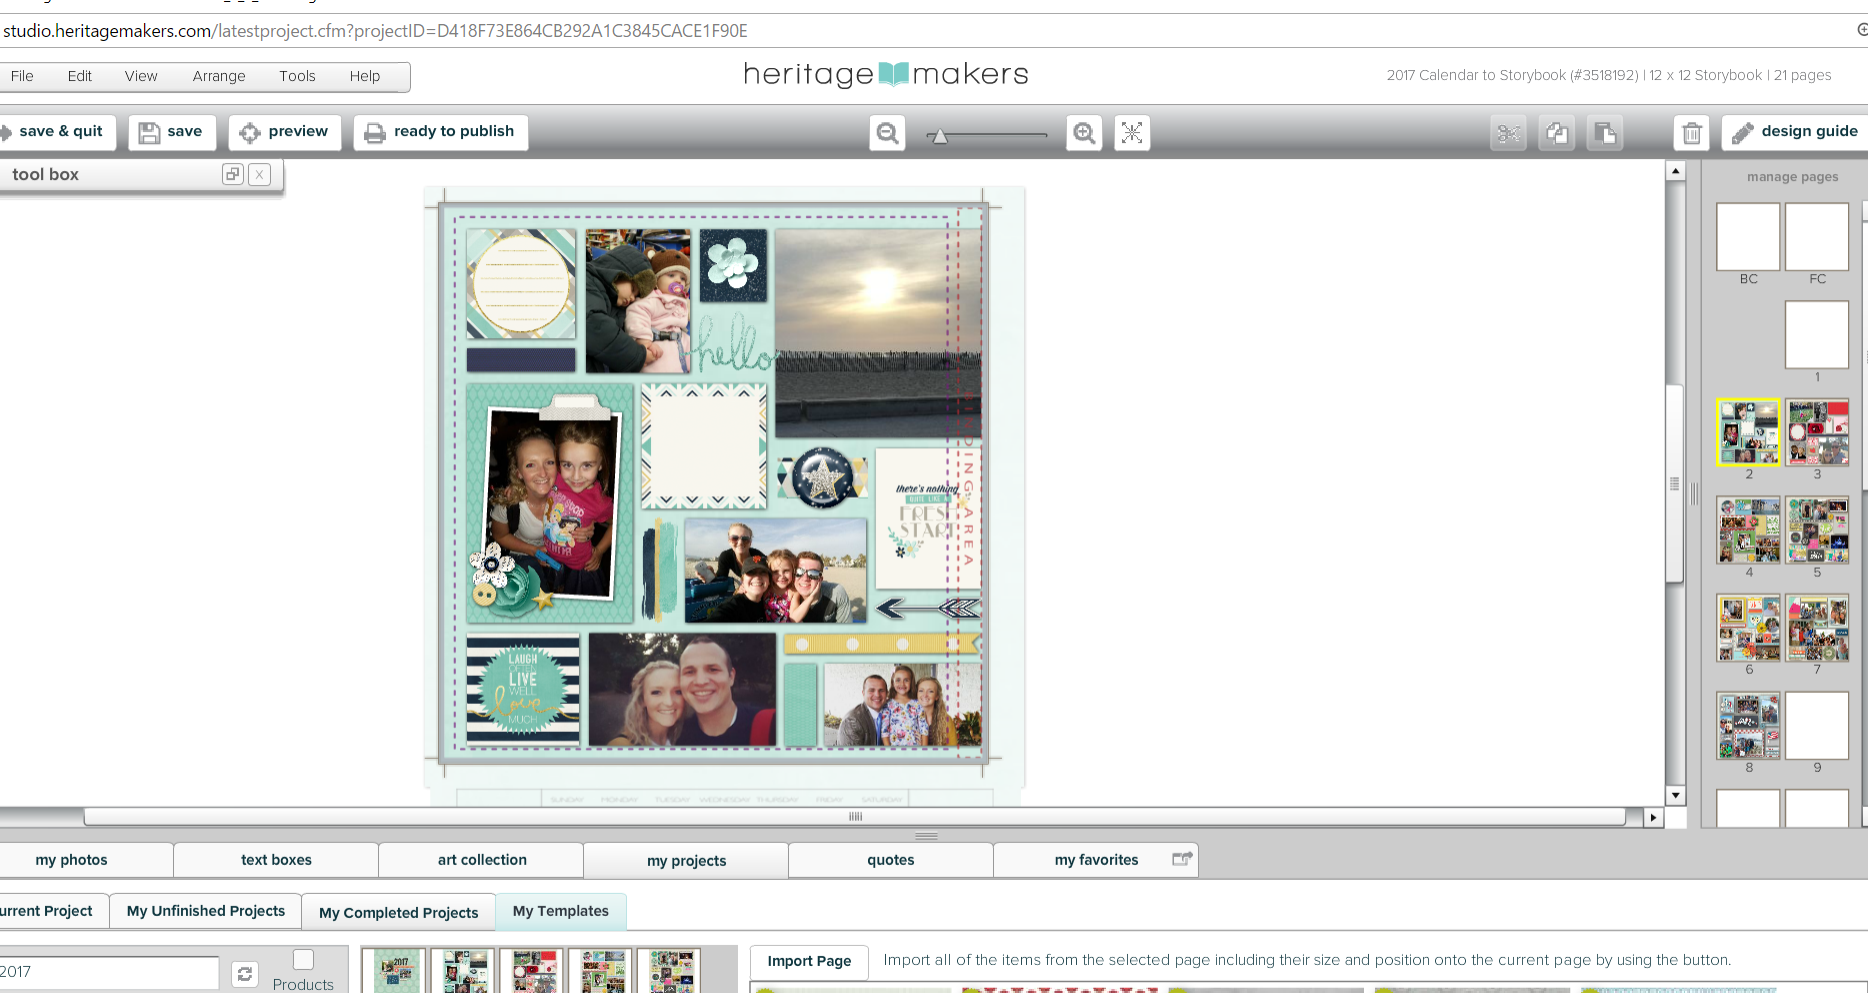
This month, all Storybooks are on sale for 10%! To commemorate this month’s awesome savings, I wanted to highlight a feature and ability that I love about creating Storybooks in Heritage Makers. Heritage Makers gives us the versatility to import previously designed projects into other product types using the fabulous Import Page feature. So just how do you convert one project type to another? The Import Page feature found in Studio is what makes it all possible.
How to turn your projects into storybooks in just 4 easy steps:
1. Start a blank, new project of the Storybook size of your choice.
2. Referring to the My Projects tab at the bottom of your screen, you can find all of your projects and their contents. Find the project you want to import from.
3. Once a page is selected, click the Import Page button found at the top of the tool bar tab, and ta-da! The design is now ready to go in your Storybook.
4. If you’re importing a page that is a different size than the selected Storybook project size, you will need to use the Select All feature in your Tool Bar to either enlarge or shrink down the size of the imported contents to fit to your page. Our Support Center has great resources of how to walk through this process. The Import Page video tutorial is available for your use at any time. Good thing to note is that most all have similar or exact Storybook sizes they can easily transfer into.
You do have to import each page at a time. However, this does allow full customization abilities, as you can choose which pages to import, from either just one project, or multiple projects. We love the ability to custom make what we want in Heritage Makers!
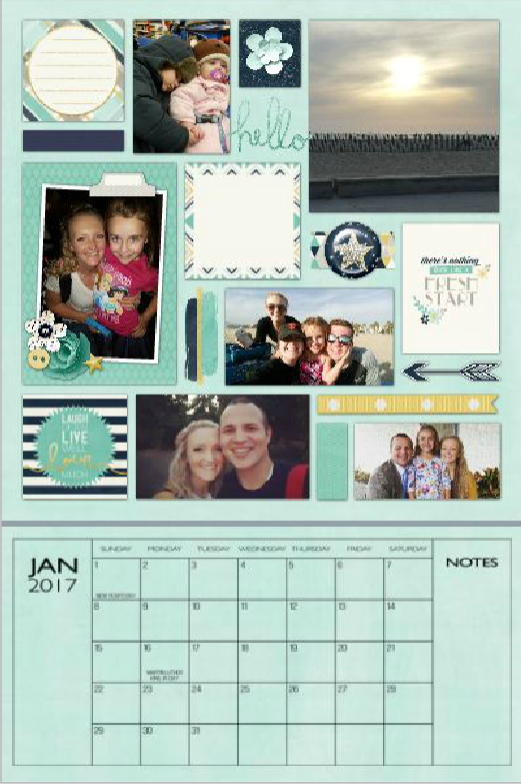
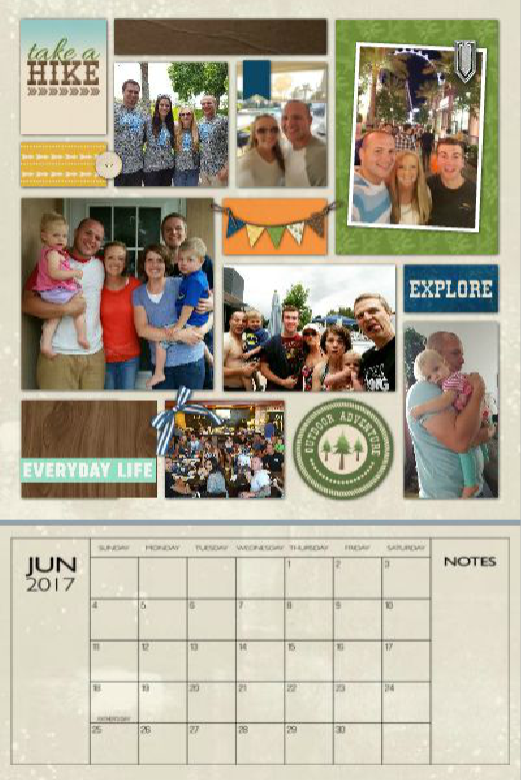
Each year I create a calendar for my home using the previous year’s photos.
I love doing this because it brings back all of the memories and events of the last year. Each time I look at the calendar pages and photos, I am instantly brought back to those times, and I think of how much has happened since then. I love having those moments to take a step back and reminisce.
As the calendar year is over, I then am faced with the dreaded decision of if I can let myself throw away my cute and cherished calendar…enter the magic of the Import Page ability and Storybooks! My predicament is solved as I refer to my previously made calendar pages and import them into a blank Storybook project. Within just a couple of weeks, all of my calendar memories arrive at my doorstep, inside of a beautiful, bound Storybook.
What stories do you have yet to be told?
They may be sitting in your account, all ready to transfer and order! Share them in a Storybook, whether for your own use and display at home, family history, or as gifts to your loved ones.
These calendars-turned-storybooks make great gifts to share, especially with parents grandparents. This same process can be done with single scrapbook pages that you may have previously designed and ordered. Creating Storybooks from past projects is such a great way to overcome the sometimes daunting task of putting together a storybook.
Here is an example using my own calendar for this year. I’m currently making it from my recently created 12 x 18 Now and Later Calendar into a 12 x 12 Storybook. Within a matter of minutes, I can have a storybook filled with my calendar pages! Since Storybooks need at least 21 pages, I have extra room in my book to add other designs and layouts from my other projects I have made throughout the last year. It’s my own little history of 2016!
-Lisa E.
Posted in: